How We Use Teams Shared Channels
Shared Channels in Microsoft Teams allow you to invite people who are not in the Team into a channel in that Team. We are primarily using them to bring in external users, but you can also use them internally. For example, you can have a Private Team with only select staff in it and have a Shared Channel where you can invite all staff to communicate with that group. Think of it as the opposite of Private Channels, whose members can only be a subset of the members of the Team the channel is in.
The advantages of Shared Channels with external users are:
- They show up for the external users in their Teams, without having to switch out of their organization’s Teams
- When they are @mentioned, it shows up in their activity feed along with their organizational feed
- They don’t miss anything on either side, because they’re not switching
- They only see the Shared Channels they are invited into, not the whole Team
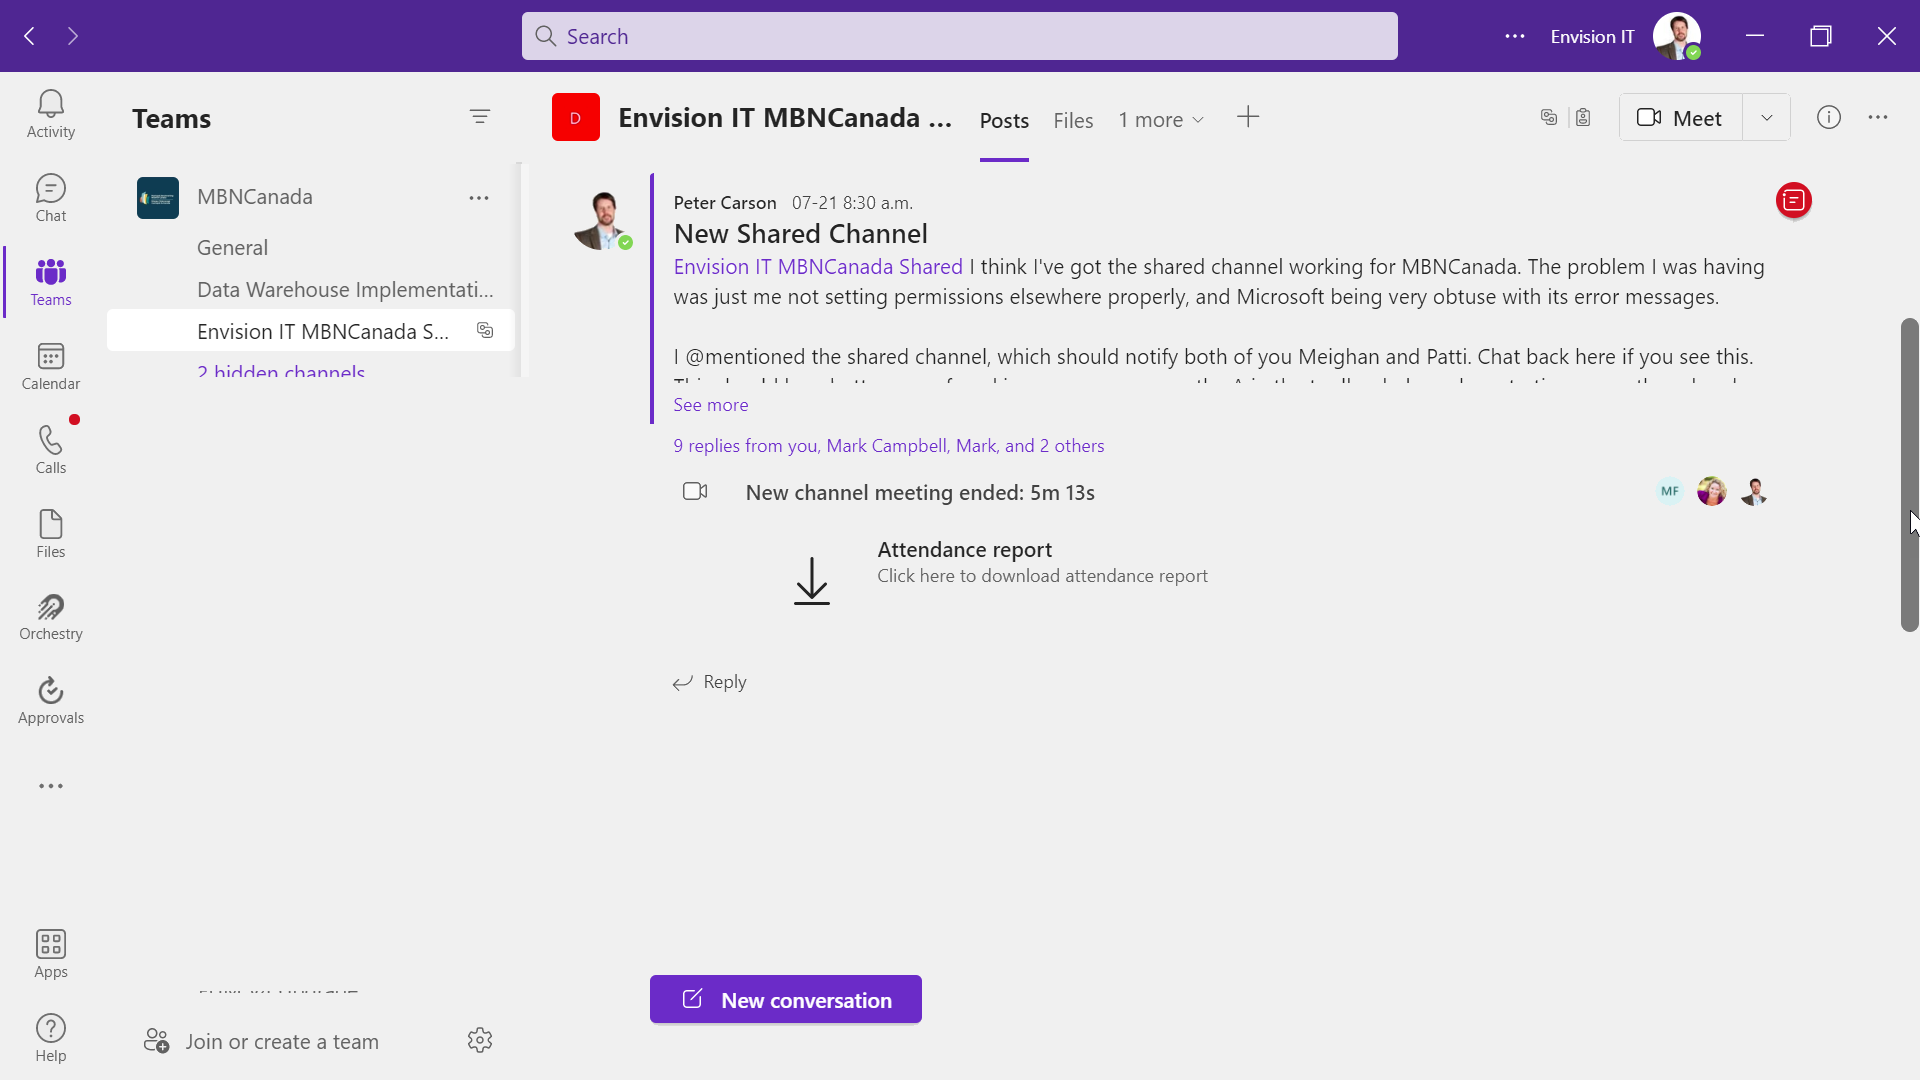
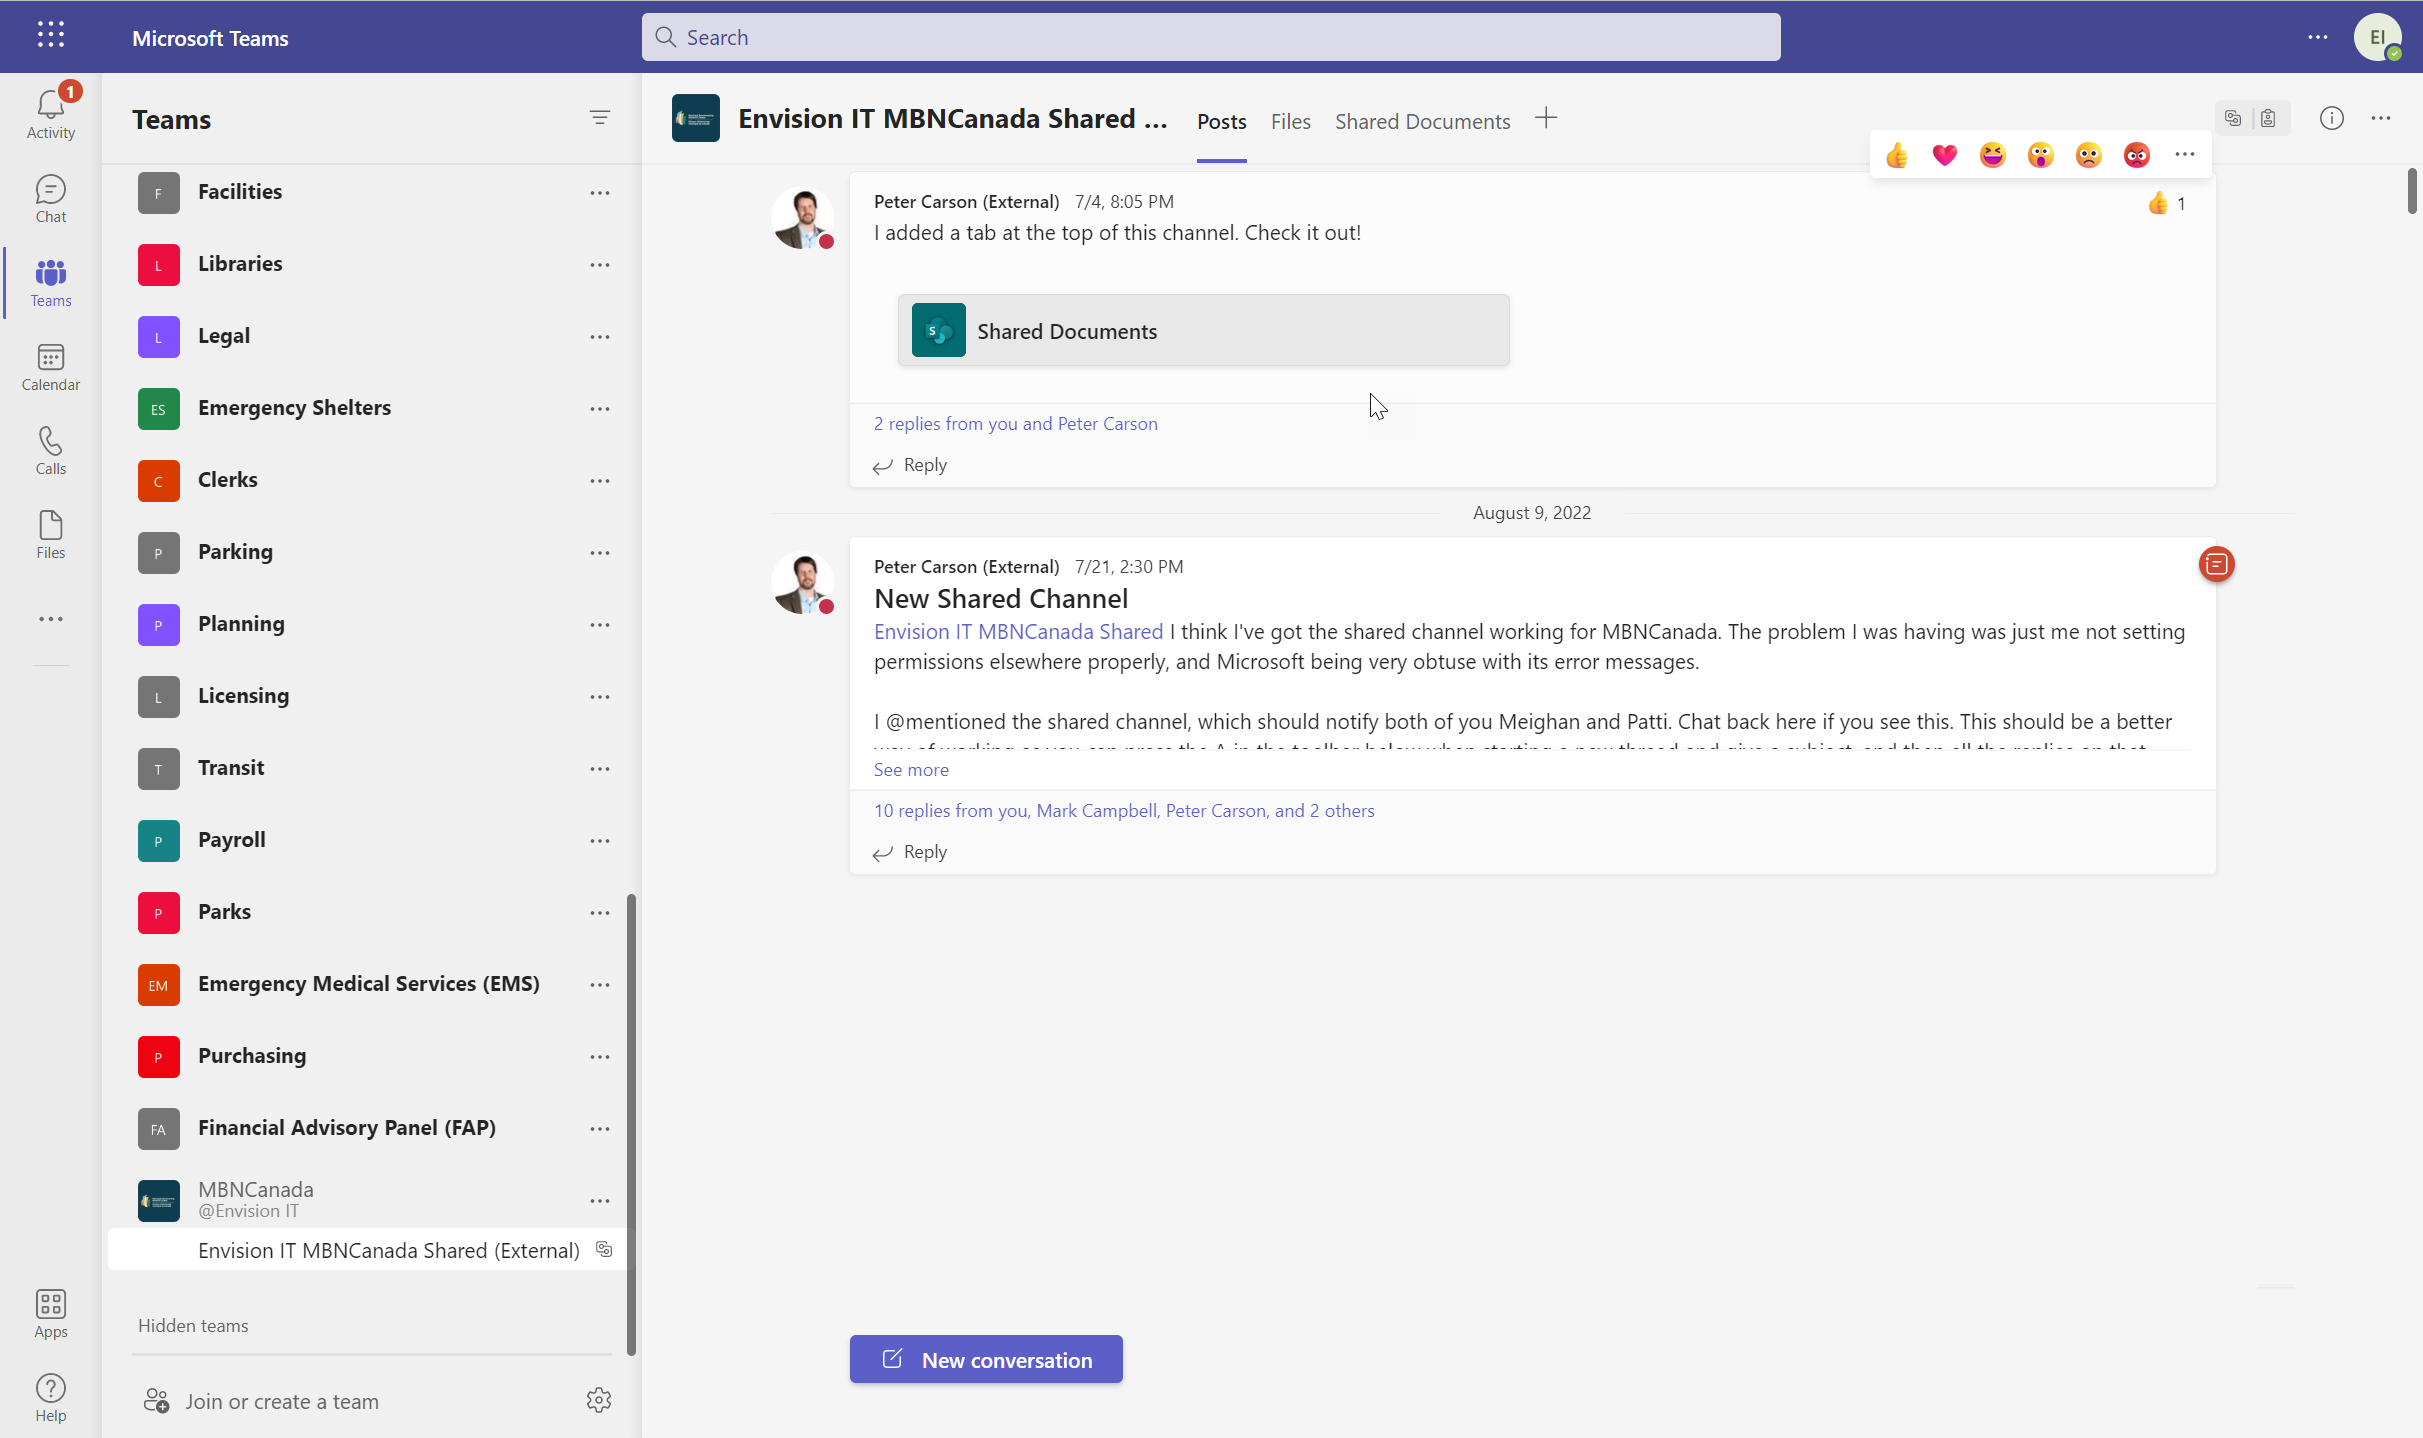
Below on the left is a view of our Team for MBN Canada, one of our clients. On the right is MBN Canada’s view of the same channel in their Teams. We are each in our own organization, and we see this channel in our regular list of Teams. It can be moved or hidden as needed, and it shows in the Activity feed, just like any other Team.
Users that are external to your tenant that you want to add to a shared channel are not like regular guest users in Azure AD. In fact, they don’t need to be invited as guests at all. What needs to happen is that their organizations need to be added as allowed organizations in B2B Direct Connect. This can be done by default for all organizations, but we recommend it be done individually for each organization you’ll be collaborating with. Each organization also needs to allow outbound access to your organization, so it does require some administrator configuration on both sides.
To do this, you need to be a Global Administrator in your tenant. You’ll also need to have a Global Administrator in the other tenants validate or update their settings. Here’s what needs to be done.
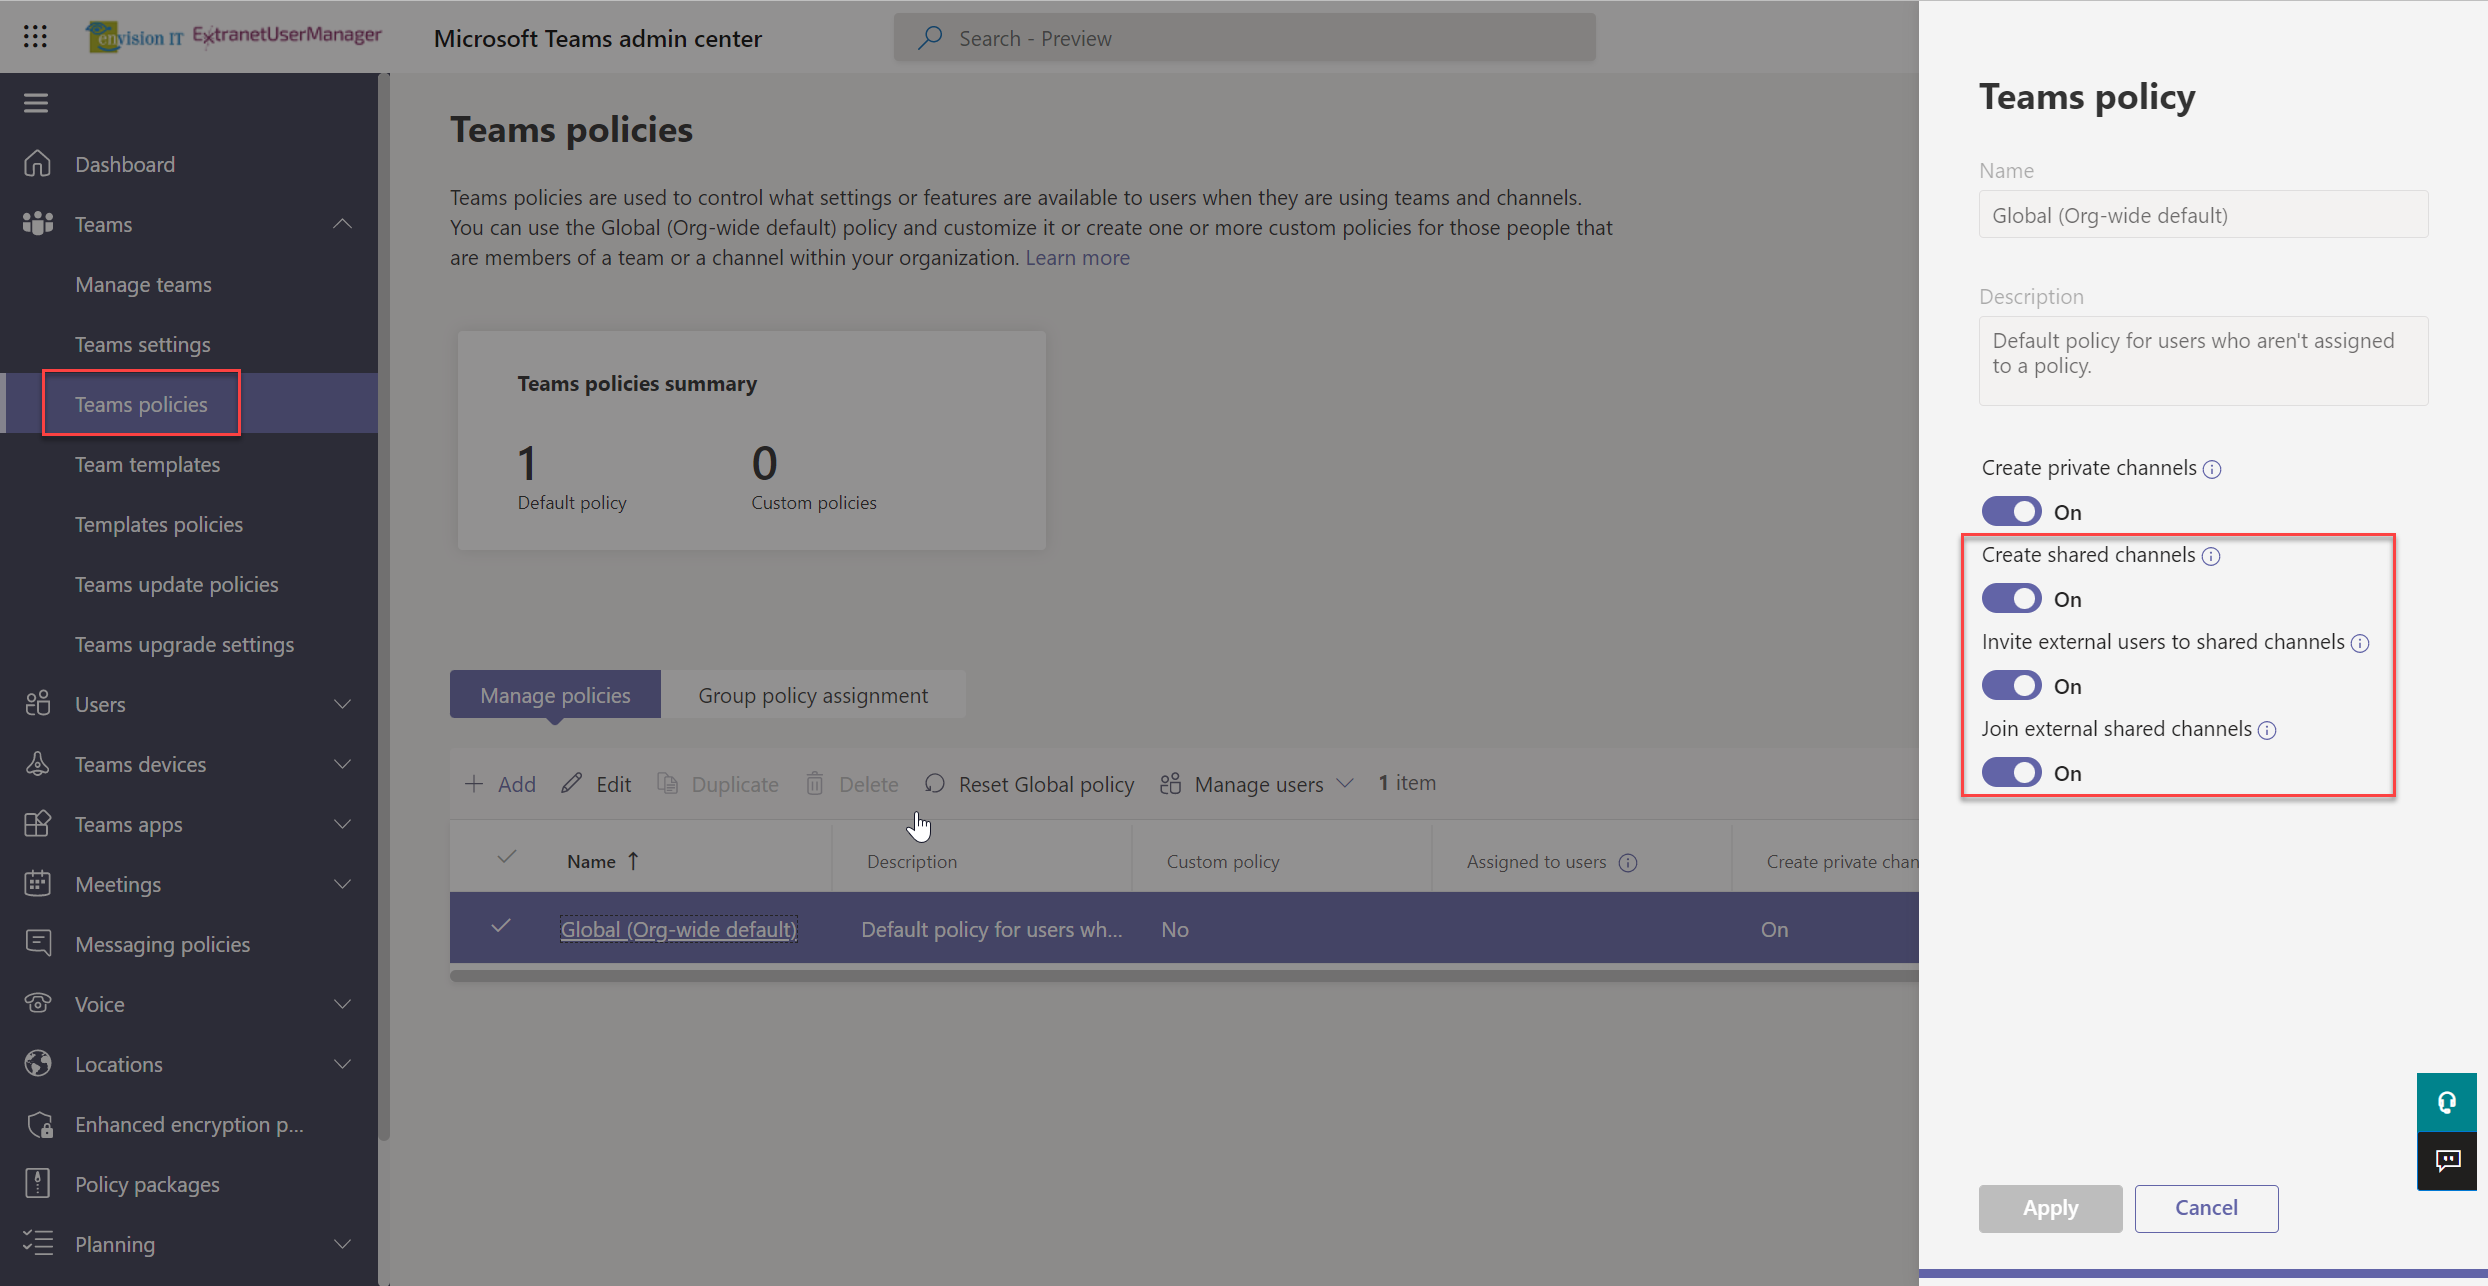
Teams Policies
The host tenant needs to have the Shared Channel policies enabled in their tenant. By default, this is enabled across the organization, but it can be restricted through different policies applied to different groups of users. This can be validated by a Teams administrator in the Teams admin centre.
Hosting Tenant
The tenant that is hosting the Shared Channel needs the following settings in their Azure AD External Identities.
This is configured in the Azure portal at External Identities.
You can update the default settings to allow inbound connections from any organization, but we recommend explicitly adding each organization that you want to add to Shared Channels explicitly.
Use the "Add organization" button to open a search dialog where you can search for any organization that has an Azure AD tenant. Bear in mind it is not expected that this will work between clouds such as Commercial and GCC (Government Community Cloud).
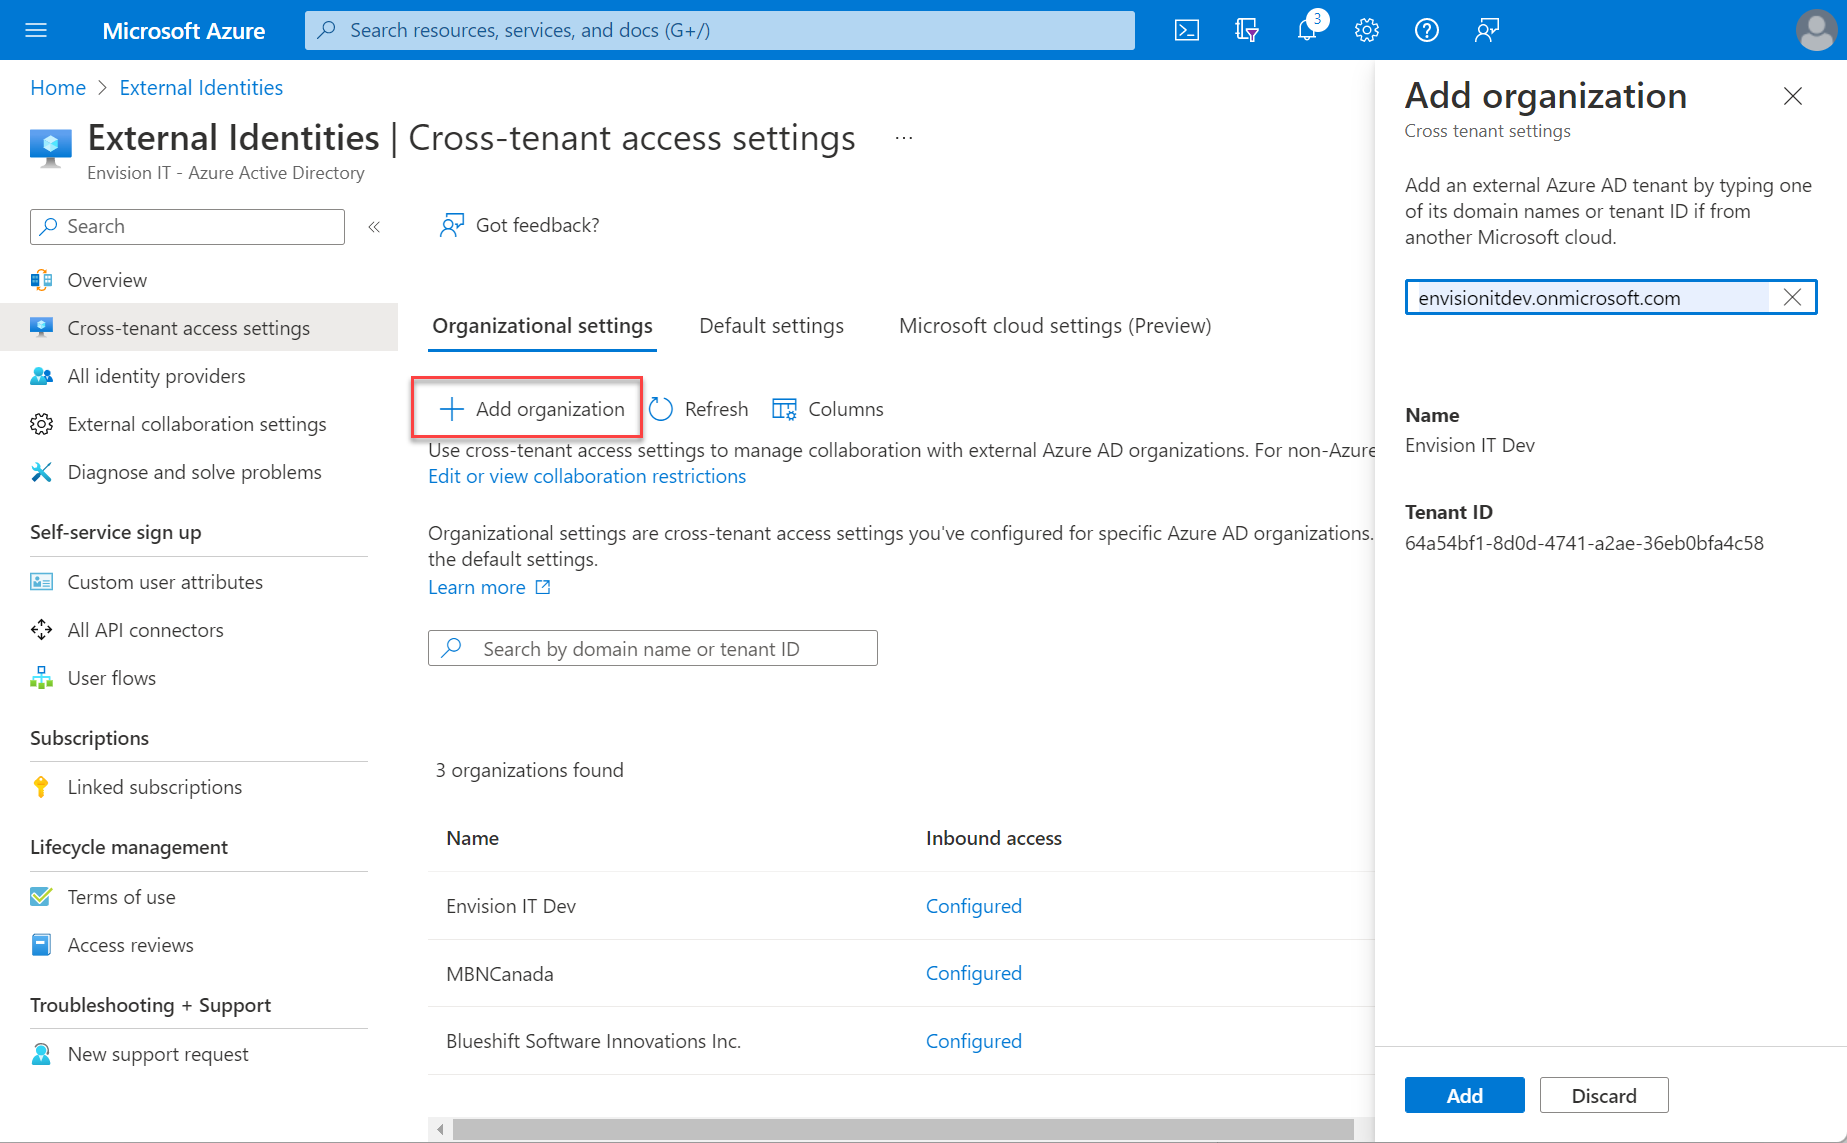
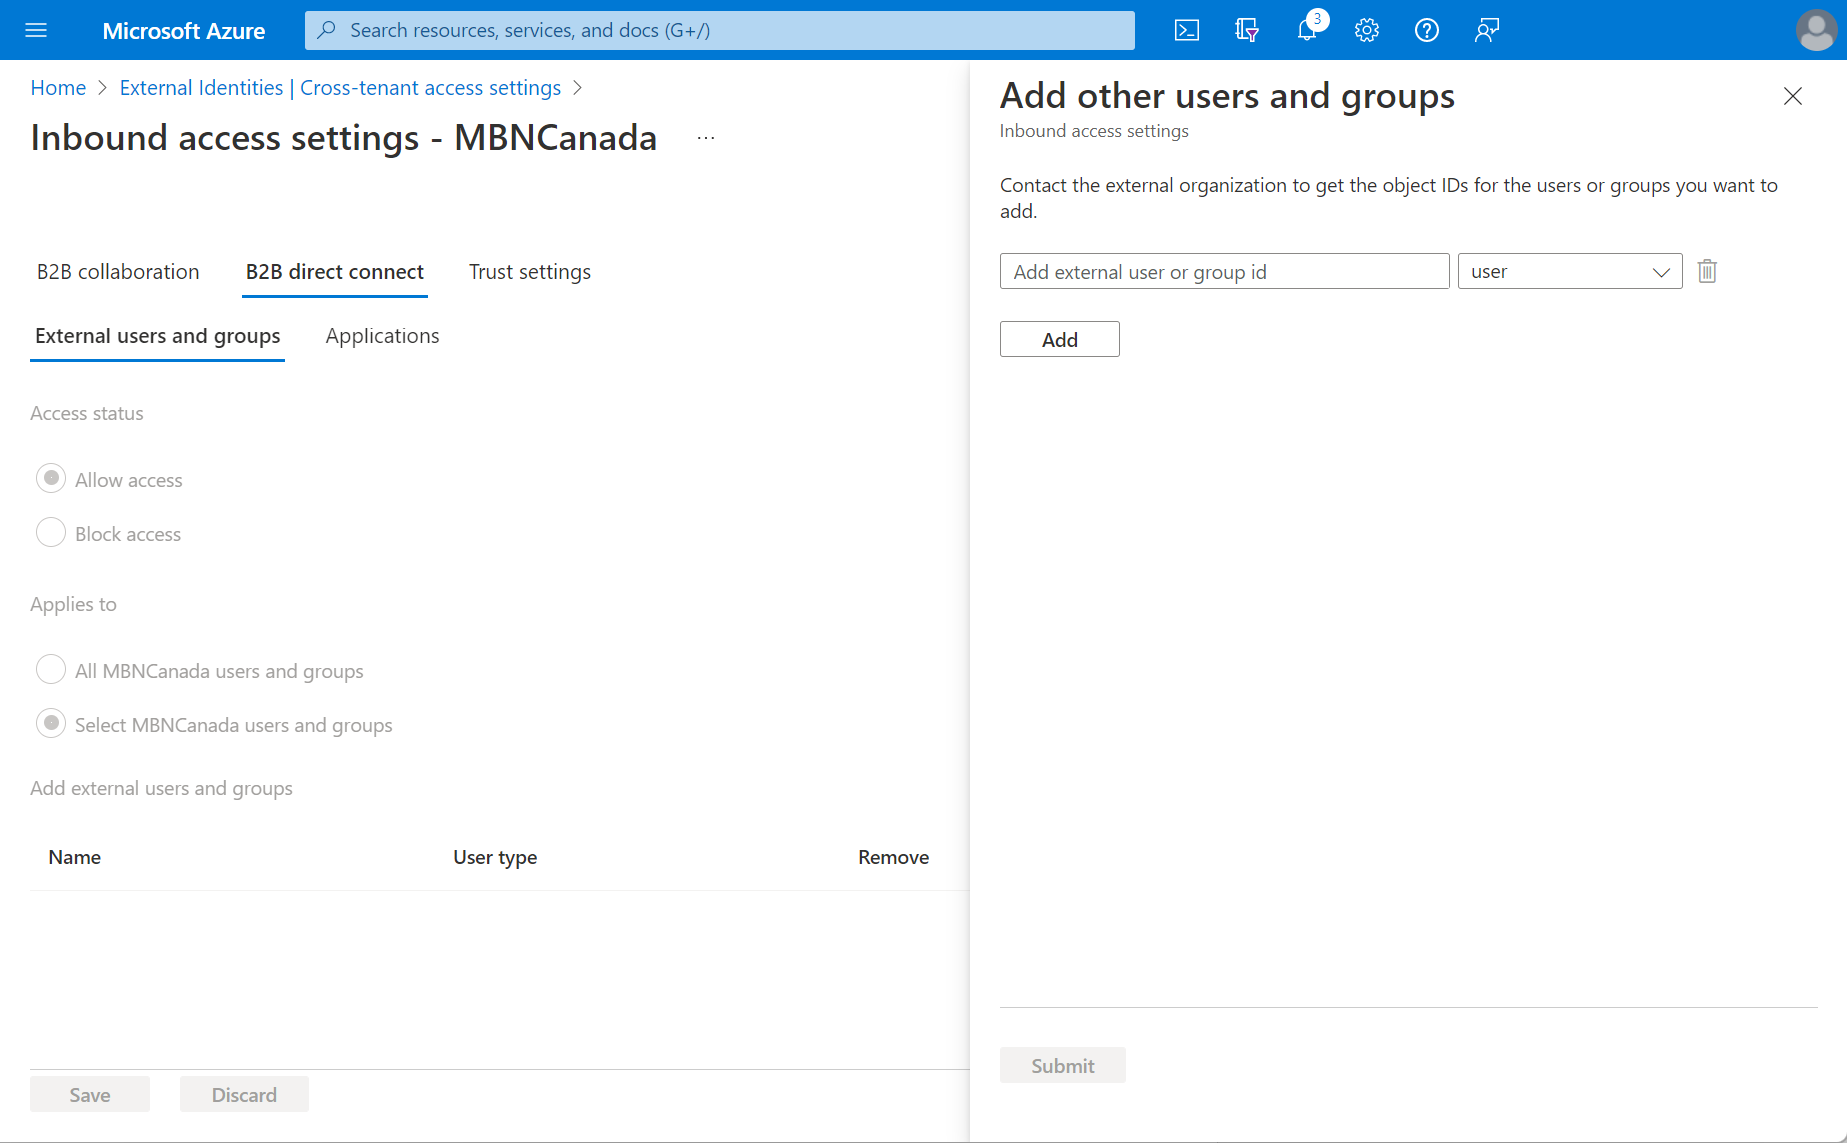
Once the organization has been added, you can then set defaults for it. You will need to allow inbound access to members of that organization to be added to your Shared Channels. You can do this for all members, or just specific users or groups. These groups are defined and managed on the other tenant side, so you need to contact the other organization to get the object IDs for the users or groups you’d like to add. This protects the identity store of the other organization from external browsing, which is a good thing from a security perspective.
External Tenant
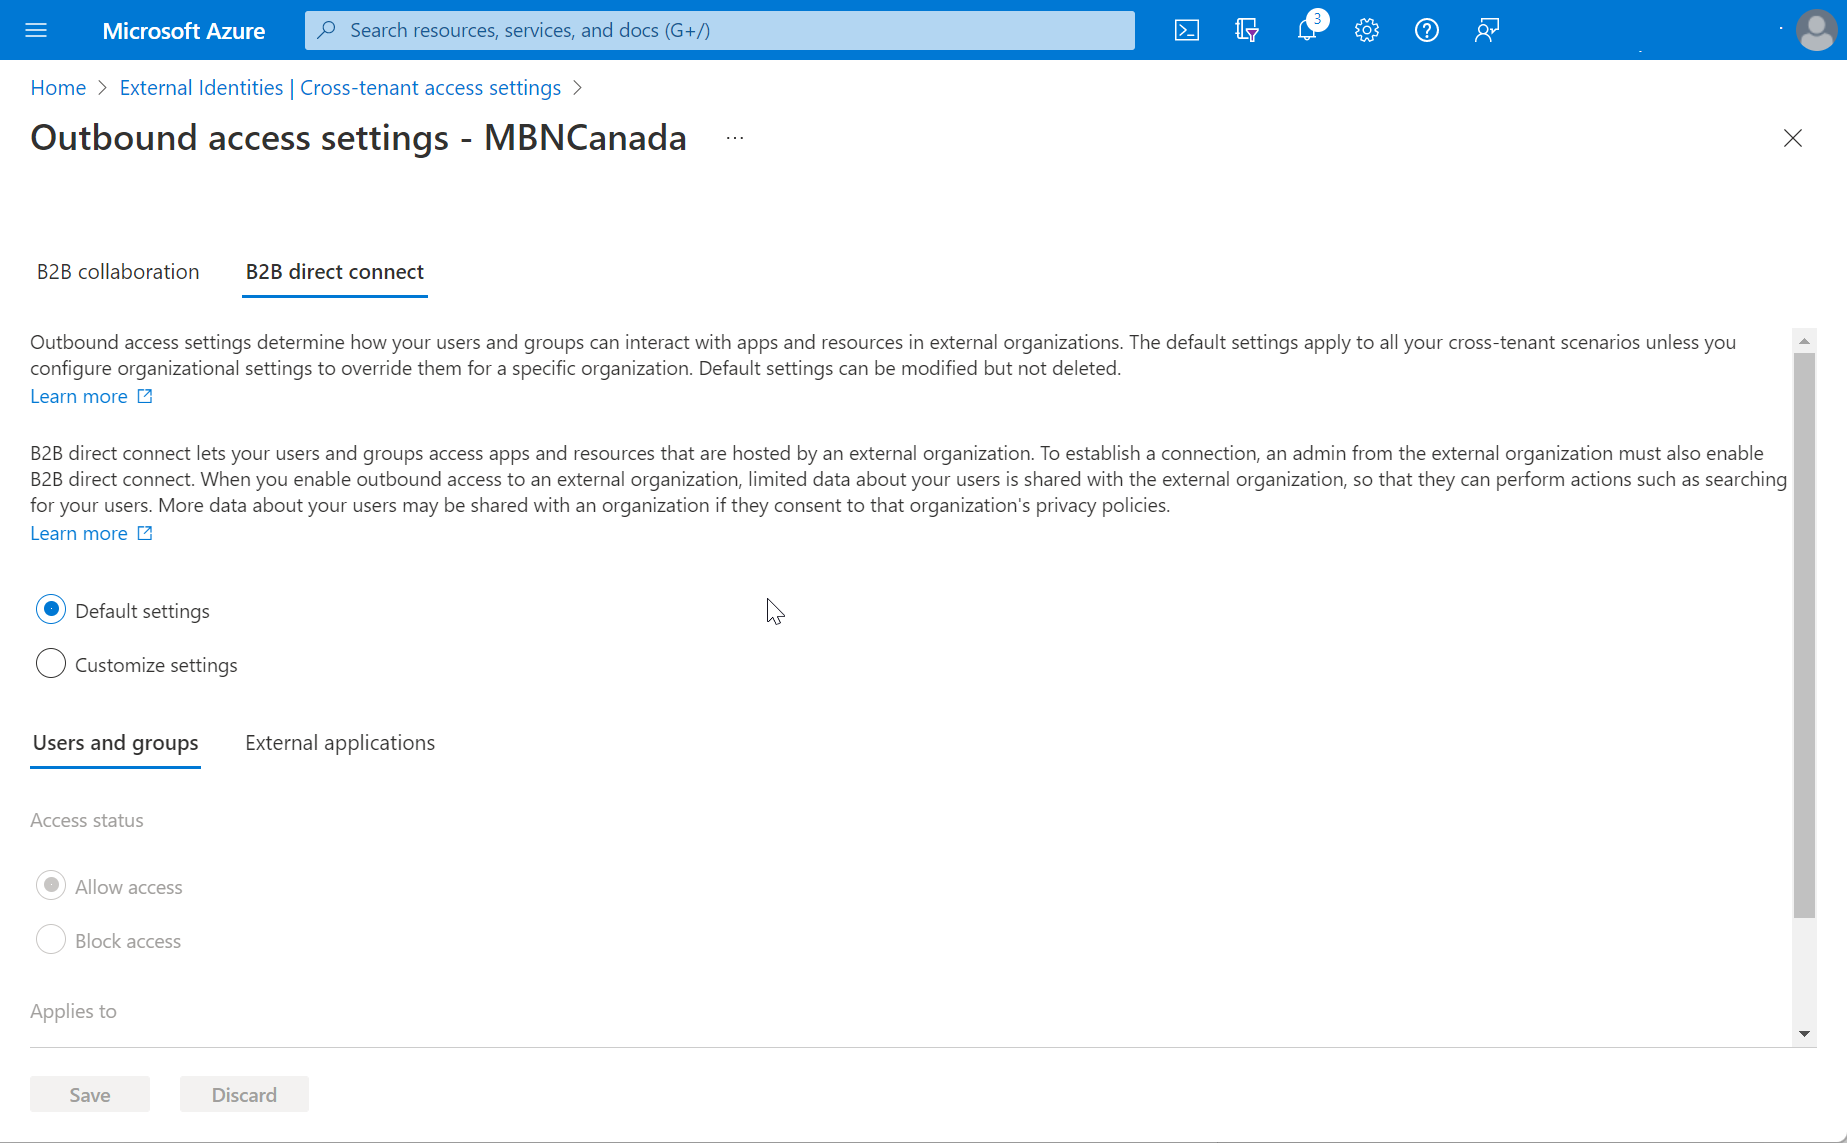
The external tenant that is being invited into a Shared Channel also needs to enable outbound access to your tenant for the Shared Channel to work. This can also be done either at the individual tenant level or enabled for all organizations. The choice is primarily driven by a desire to control the tenants that members of that organizations can join Shared Channels, or whether it is reasonable to keep it open to all tenants.
Like the inbound settings, this can also be restricted to specific users or groups. Since this is for the same tenant, you do get the full user and group search and selection features.
From a governance perspective, you could decide to define a group that users need to belong to before they can participate in a Shared Channel with another organization. Training or compliance review could be part of the requirement to be added to the group.
Creating the Shared Channel
Once the B2B Direct Connect settings are properly configured on both sides, you are ready to create the Shared Channel. Navigate to the Team where you want the Shared Channel, and select Add Channel. Name your channel and select "Shared" as the privacy option. We are often creating Shared Channels for use with individual clients, so we like to name them prefixed with Envision IT and then the client’s name. This makes it obvious from both perspectives what it is for.

Shared Channels are enabled by default in Teams. You can choose if people can create Shared Channels, if they can share them with people outside your organization, and if they can participate in external Shared Channels by creating a channel policy in Teams Admin.
Microsoft Links
Latest Articles
Related Pages
{{{hyperlink RelativeURL Title Title null}}}
{{#if EventStartDate}}{{eventDate EventStartDate EventEndDate}}
{{/if}} {{#if PublishedDate1}}{{generalDate PublishedDate1}}
{{/if}} {{#if RollupContent}}{{{RollupContent}}}
{{/if}}{{{hyperlink RelativeURL Title "Read more..." null}}}